OATS AND CRACKED WHEAT RAVA IDLI


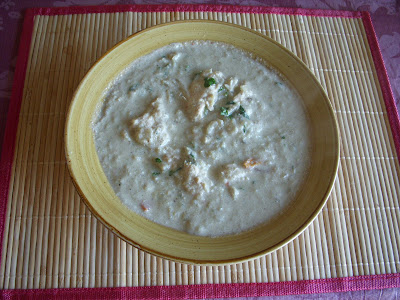
This is a regular wheat rava idli preparation I make sometimes for dinner. I usually add powdered oats in the batter. This time, I tried adding oats bran and it did turn out pretty tasty. I didn’t feel any of the grittiness from the bran. The idlis were soft too and just like regular rava idlis. The recipe can be changed to a regular rava idli recipe by omitting the oats and substituting another half a cup of cracked wheat. The ingredients I have used here makes up to 12 medium-size idlis. We had these with peanut chutney and tomato chutney.


Dear friends, I am taking a small break from blogging for a couple of days, some last minute vacation plan :) I'll see you all next week :)


INGREDIENTS:

1. Cracked wheat, 1 cup.

2. Oats flour or oats bran, ½ cup. (To make oats flour, blend regular oats in a blend to a powder texture).

3. Thick sour yogurt, 1 cup.

4. Water, 2/3 cup or more depending upon batter thickness.

5. Baking soda, 1/4 teaspoon.

6. Salt, ½ teaspoon.

7. Chopped cilantro, ¼ cup.

8. Broken cashews.


PREPARATION:

Fry the cashews in a little oil until they turn golden brown. Mix wheat rava, oat bran, beaten curd, baking soda, salt, cashews, chopped cilantro with 2/3 cup of water. Add more water if needed until the desired consistency is reached. The batter should be just thick enough to pour into the molds. Pour the batter into regular idlis mould and steam for 10 minutes. Once cooled, remove from the mould and serve hot with any chutney or sambar.


Variation: Mustard seeds can be spluttered and added to the batter and fried channa dhal can also be added.

MEEN KUZUMBU/SPICY FISH GRAVY


This is a very common dish but I have so many memories and nostaligia associated with this dish. This is my all time favorite seafood dish and my mom used to make this very often for me, sometimes even thrice a week! Mixed with rice and a fried fish on side, this is the ultimate comfort food for me. Meen kuzumbu always reminds me of my grandma and her cooking. For me, the best seafood dishes I ever tasted are my grandma’s only. Whenever I taste meen kuzumbu or prepare it at home, I always compare notes with hers. I remember when I was a kid my mom used to coax us to having lunch saying that it was cooked by grandma and then we would go and sit in the dining table right away ;) This post is dedicated to my grandma who is right now in India. I learnt my cooking basics from her. She is the reason that my sister and I were not latch-key kids. I miss her a lot, though I talk to her over the phone often; it is still not the same like being there.


INGREDIENTS:

  1. Small onions, 1 cup.
  2. Tomatoes, medium sized, 2.
  3. Fish slices, any type, around 5-6.
  4. Garlic, 3-4 cloves.
  5. Ginger-garlic paste 1 teaspoon.
  6. Tamarind, 1 lemon-sized ball.
  7. Chili powder, 2 teaspoons.
  8. Coriander powder, 2 tablespoons.
  9. Sambar powder, 1 teaspoon (optional).
  10. Turmeric powder, ¼ teaspoon.
  11. Curry leaves for seasoning.
  12. Salt for taste.
  13. Vadakam for seasoning (optional).
  14. Mustard seeds for seasoning.


PREPARATION:

Clean and wash the fish well. Once the fish is cleaned, add ½ teaspoon of salt and the turmeric powder to the fish and mix everything well until all the slices are coated with the turmeric mixture. Let it sit for 15 minutes. Extract thick tamarind juice from the tamarind and dice the onions and tomatoes into small pieces. The small onions can also be left as whole. Heat a pan with some sesame oil. When the oil is hot enough, add the mustard seeds and let it splutter. Then add the vadakam and fry for a few seconds and then add chopped onions and sauté for a few minutes until the onions turn brown. Add the tomatoes, curry leaves, garlic cloves, and ginger-garlic paste and keep sautéing until everything is blended. Add the powders one bye one and keep frying on a low flame with another tablespoon of oil until good smell comes from the mixture. Add the tamarind juice and salt and cook closed in medium flame for 10-12 minutes and the gravy starts to thicken. At this stage, add the fish slices and let the gravy cook for 5 more minutes until the fish is cooked. Once the fish is cooked, garnish with chopped cilantro and serve hot with rice, idlis or dosas.

RICE PAYASAM AND MOONG DHAL PAYASAM/KHEER

These payasam recipes are for my mom to give her an idea about sugar-free Indian desserts. Whenever my mom prepares any traditional sweets on festivals, my dad will sometimes miss out on all the sweets, especially during festivals like Diwali. Since Tamil New Year is around the corner, I am hoping that my mom would prepare these for my dad for the New Year. I am reposting the moong dhal payasam recipe also in the same post. The two kheer/payasam recipes posted here are sugar-free. I have used agave nectar instead of jaggery here. When going for sugar-free substitutes, I go for ones with natural ingredients like agave nectar or Truvia in the raw, since natural ingredients are devoid of any side effects and ideal for long term use.

I would also like to say a few of my random thoughts which I have observed from some of my friends and family members. Generally when a person is diagnosed with diabetes, they start cutting out on sugars, which is really good for blood sugar control. Sometimes people go to the extremes saying that “I am getting used to not having any sweet at all, even fruits and these days I am even used to the taste of drinking my tea without sugar”. These words were said by a close family member of mine and I felt that I should definitely say something about this in my blog. From my own experience, this type of extreme diets will result only in cravings for sugary foods and will result in overeating the same. I feel that there is no necessity to go to these extremes and cutting down on everything. These days, sugar-free and fat-free alternatives are available everywhere ranging from ice cream, jam, fruit juices, cereals to even mouthwash. We have to read the labels and choose the right ones with natural ingredients. These sugar-free substitutes have a carbohydrate value of 1 g or lesser than that, hence they are no-carb or low-carb. There are even products, which are sweetened with fruit or fruit juices, so if anyone is a little skeptical about using artificial ones, they can always go for these kind of products, all we need to do is check the ingredients in the labels. Please beware that sometimes sugar-free products are also sweetened with sugar alcohols. Sugar alcohols can lead to stomach upsets and gastric issues, so that if there sugar alcohol is one of the ingredients in a jam or ice cream, just go for a different one.

Coming on to the recipes, I am sending these two kheers to Kheer Festival conducted by Shama.


I modified the rice payasam a little bit by using brown rice instead of regular rice.


RICE PAYSAM/KHEER


INGREDIENTS:
1. Brown rice,1/4 cup.
2. Milk, ½ cup.
3. Fat-free half and half, 2 tablespoons, (optional).
4. Grated or dry coconut, 1 tablespoon.
5. Jaggery or agave nectar or any sweetener of choice, ¼ cup or more.
6. Cardamom, 2.
7. Raisins and nuts like cashews, almonds, and pistachios, ¼ cup. They can be chopped or left whole.
8. Ghee or unsalted butter, 1 tablespoon. (I used a low-fat version).

PREPARATION:
Crush the cardamom coarsely. Cook the rice separately and let it cool. Once the rice is cooled, pulse it coarsely using a blender or food processor. Heat a pot with the butter. Once the butter is melted, add the raisins and chopped nuts and fry for a few seconds and until the raisins are plumped up and the nuts turn golden brown. Add the milk, half and half, crushed cardamom, coconut along with 2 cups of water and the rice and let it simmer for 5 minutes. Once the mixture starts to thicken add the sweetener and let the kheer simmer for a few more minutes until the desired consistency is reached. Serve hot or chilled.


MOONG DHAL PAYASAM


INGREDIENTS:
1. Split moong dhal, 1 cup.
2. Agave nectar/brown sugar/any sugar substitute, 1 cup.
3. Cardamom pods, 2.
4. Ghee/butter 1 tablespoon (I have used Promise Activ Butter here).
5. Dry fruits, raisins, and mixed nuts like cashews, pistachio etc chopped, around ½ cup.
6. Milk, 1 cup.

PREPARATION:
Crush the cardamom pods coarsely. Wash the dhal well and transfer it to a microwave-safe dish. Add enough water to cover the dhal, add the cardamom powder, and microwave it on high for 15-20 minutes until the lentils are cooked and soft. Meanwhile, heat a small pan with the butter or ghee and fry the dry fruits and nuts until good aroma comes from the mixture. Pour this over the cooked dhal, add the sugar or sweetener and milk, mix everything well and microwave for 5 more minutes. Some water can be added for the desired consistency, add extra ghee if needed and enjoy hot or cold.

REPOSTS FOR EVENTS

These are some of my recipes I am sending in for the following events.

I am sending the following pancake recipe for Pancakes event conducted by Priya.


Low calorie chocolate chips pancakes


I am sending in the following entries for Cruciferious challenge and cauliflower conducted by Yasmeen


Broccoli stalks poriyal

Kale and white bean soup

PERUVIAN CHICKEN


Peruvian chicken is very different from the regular spicy Indian chicken curries or fries. If you love middle-eastern dishes or similar culture dishes, you are sure to love this. The cumin flavor in this chicken takes the whole flavor to a different level. My husband always brings a takeout for me from a Peruvian restaurant, which is very close to his office. The box usually consists of a big portion of broiled chicken, Peruvian style, served with baked beans and a salad. This time I tried to recreate the same at home with some skinless chicken breasts. I did see a few sites and included some of own ingredients also. I baked the chicken instead of broiling it and the color was a little bit light but the taste was very similar to the original one. I think this can also be grilled, may be I should try that next time :)


INGREDIENTS:

1. Chicken, any type and cuts, 1 pound.

2. Vinegar, 1 tablespoon.

3. Garlic paste, 1 teaspoon.

4. Fresh coriander powder, ½ teaspoon.

5. Fresh cumin powder, ½ teaspoon.

6. Cracked pepper, ½ teaspoon.

7. Salt, ½ teaspoon.

8. Paprika powder, ½ teaspoon.

9. Oil, 1 teaspoon.

10. Dried or fresh oregano, ¼ teaspoon.


PREPARATION:

Wash and clean the chicken and keep aside. Mix all the ingredients except the chicken in a separate bowl. Add the chicken pieces to this mixture and mix well until all the pieces are well coated with the spices. Let it marinade for about an hour or overnight in the fridge. Preheat the oven to 400 degrees and bake the chicken lined in a baking sheet for around 25-30 minutes depending on the cuts. Serve hot as a starter or as a whole meal with some salads and accompaniments.

The chicken can also be cooked stove top in a heavy-bottomed pan with some oil. Keep flipping the chicken for a few minutes on each side until the chicken is cooked through.

FLAXSEEDS AND PEANUT PODI


I developed the habit of eating podis with rice from my husband. He loves all types of podis. These podis also makes for a quick lunch with some rice when we go out anywhere for long hours and come home hungry. With just some sesame oil or ghee, podis and rice makes a delicious meal. Coming on the podi recipe, I made this for the first time after seeing it in a magazine under the name “Andhra style podi”. This time, I tweaked the original recipe by adding some flaxseeds, garlic powder, cumin seeds, and curry leaves. The result was so flavorful and many times tastier than the original version. We loved it so much that the whole bottle was over in just a few days and I have been making it this way since then.


INGREDIENTS:

1. Shelled dry peanuts, 1 cup.

2. Roasted channa dhal (pottukadalai), ½ cup.

3. Flaxseeds, ¼ cup. If ground flaxseeds are used, fry them for a few

4. Garlic powder, 1 teaspoon.

5. Cumin seeds, 1 teaspoon.

6. Red chilies, 5-6 or more depending upon the preferred heat level. My version was little bit mild.

7. Salt as per taste.

8. Curry leaves, 2 sprigs.


PREPARATION:

Dry roast peanuts and flax seeds under low flame until they turn to a slight brown color. (If ground flaxseeds are used, they can be roasted separately for a few minutes and added to the powder in the end). Now roast the red chilies, cumin seeds, and curry leaves separately. The curry leaves turn crispy. Let everything cool and once cooled blend all the ingredients (both roasted and the other) into a smooth powder. To serve, mix in a tablespoon of powder with some rice and ghee or sesame oil and enjoy.

WHITE CHICKEN KURMA


This is a Sunday favorite at my in-laws’ place. We usually make this for Sunday breakfast for idlis and dosas. Though the color of this dish may appear bland, it is super spicy and for me the best combination is with crispy dosas. This can also be made as a vegetarian dish by substituting the chicken with veggies. I have followed my mother-in-law’s recipe here, the only change I made from hers is that I reduced the coconut and replaced it with some nuts. This gives the kurma the same creaminess and taste without all the extra saturated fat. The chicken used here is skinless white meat chicken, so presenting a low-calorie version of my family favorite vellai kurma.


INGREDIENTS:

  1. Chicken, around 1 pound.
  2. Onion, medium-sized, 2.
  3. Tomato, 1.
  4. Ginger-garlic paste, 1 teaspoon.
  5. Green chilies, 2-3 or more, depending upon preferred spice level.
  6. Grated coconut or dry coconut powder, 1 tablespoon.
  7. Cashews or almonds, 2 tablespoons.
  8. Fennel seeds, ½ teaspoon.
  9. Garam masala, 1 teaspoon. (optional).
  10. Salt, as per taste.
  11. Curry leaves and cilantro for seasoning.


PREPARATION:

Grind the coconut and the nuts into a smooth paste with some water. Clean the chicken and cut it into bite-size pieces. Dice the onion and tomato finely and the green chilies into two. Heat a pan with some oil. When the oil is hot enough, add the fennel seeds and fry for a few seconds. Then add the diced onion and curry leaves and sauté for few minutes. When the onions turn translucent, add the ginger-garlic paste and sauté for a minute until everything is well blended. Add the diced tomatoes, ground paste, chicken, and salt along with 3 cups of water and cook for 20-25 minutes until the chicken is cooked and tender and the desired consistency is reached. At this stage the contents can also be transferred to a pressure cooker and cooked for 2-3 whistles. Garnish with chopped cilantro and serve hot with idlis, dosas, rice, or chapathis.

RAGI PAKORAS


This is my version of ragi pakora and ragi vada recipes that I have been seeing in so many food blogs lately. I made pakoras my usual way except that I substituted ragi flour with besan. These pakoras were pretty interesting with a nice different color. They turned out real crispy and tasty. These were perfect for an evening snack with tea.


INGREDIENTS:

  1. Ragi or millet flour, 1 cup.
  2. Rice flour, 1 tablespoon.
  3. Onions, small, 2.
  4. Curry leaves, a handful.
  5. Ginger-garlic paste, 1 teaspoon.
  6. Chili powder, 1 teaspoon.
  7. Asafetida, a pinch.
  8. Salt as per taste.
  9. Oil, 1 cup for deep frying.


PREPARATION:

Cut the onion into long thin strips. Chop the curry leaves into small pieces. Add the flours in a big bowl along with the salt and add the chopped onions, curry leaves, chili powder, asafetida, and ginger-garlic paste to the mixture. Mix everything well without water. Add a few drops of water and start kneading the mixture and add water slowly and keep mixing until the desired consistency is reached. The consistency should be that there should be just wet enough for flour to coat the onions. Heat a pot with a cup of oil. When the oil is hot enough, take some of the pakora mixture and put them slowly into the oil spreading the pakora mixture evenly throughout the oil. They will start to rise to the top once they get deep-fried after 5-7 minutes. Take them out of the oil, drain them on a paper towel and serve hot with tomato ketchup.

MANGO PACHADI WITH AGAVE NECTAR


Mango pachadi is a true delicacy for us. Prepared with unripe mangoes and jaggery, this simple dish is such a relish with just rice and curd or rasam. I tried this pachadi with agave nectar from the request of a friend who was also cutting down her carbs. Initially I thought of adding honey with any sugar substitute for the pachadi but from the diabetic stand-point, though jaggery and honey are considered healthy and wholesome (these do not raise the triglycerides as compared to refined sugar for people with diabetics) but they are still on the high glycemic index range. High glycemic index foods generally raise the blood sugars quickly compared to their counterparts. Agave nectar is a natural sweetener with low glycemic index and the perfect substitute for honey or molasses. I felt this was perfect for this pachadi, moreover the taste of this mango pachadi was as close to the traditional dish made with jaggery. Dear friends, do try this dish with agave nectar and let me know how it turned out for you :)


INGREDIENTS:

  1. Unripe mangoes, 2.
  2. Agave nectar, any type, darker version gives a good color to the dish, ½ cup or more, depending upon sweetness.
  3. Salt, a pinch.
  4. Curry leaves, a handful.
  5. Red chilies, 1-2.
  6. Mustard seeds, ¼ teaspoon


PREPARATION:

Peel the skin off the mangoes and cut into small bite-size pieces. Heat a pan with some oil. Add the mustard seeds when the oil is hot and let them splutter. Then add the red chilies and curry leaves and fry for a few seconds. The chilies can be kept whole or broken according to heat preferences. Then add the mangoes along with salt and enough water to cover the mangoes and cook closed under medium flame for 10-12 minutes until the mangoes are cooked and tender. At this point, add the agave nectar and mix everything well. Cook for 5 more minutes and switch off the stove. Enjoy mango pachadi with any type rice varieties or chapathis.

ALMOND AND FIG MILK


This recipe idea is from my husband. Badam (almond) milk is a very popular drink in my region. There are different versions of this drink. Usually the milk will be very thick with all the nuts and cream with a hint of cardamom flavor. I had a craving for this milk today, so I went in for a lighter version of badam milk using fat-free milk and Splenda instead of sugar. As I was blending this, my husband joined in and threw in some dried figs to the milk and hence the name “almond and fig milk”. This was really sweet, kind of a dessert for us after dinner. Here is my low-calorie, fiber-rich badam milk.


INGREDIENTS:

1. Almonds, ¼ cup.

2. Dried figs, ¼ cup.

3. Cardamom seeds, 2.

4. Fat-free milk, 2 cups. (Almond milk or soy milk can also be used here).

5. Sugar or any sweetener of choice, 2 tablespoons.


PREPARATION:

Soak the almonds for 3-4 hours and remove the skin. Crush the cardamom coarsely. Add all the ingredients in a blender and blend everything to a smooth mixture. This can be served as it is. To serve the milk hot, transfer the contents to a pot and cook for a few minutes until it comes to a boil. Once the milk comes to a boil, reduce the flame and let it simmer for a few more minutes and serve.


I am sending this to “Think beyond the usual - fruits” event organized by Nithu Bala


These are my other entries for the event:

Apple rasam

Cranberry rice

Cranbery Rasam

Onion and cranberry chutney

Apricot pachadi

BROWN RICE KUSKA


Kuska is a type of plain briyani without veggies or meat. The rice is usually cooked in cooked in chicken broth along with the spices and served with a spicy side dish. There are different versions of kuska like adding coconut milk or yogurt. Preparing kuska with brown rice was a little bit challenging. When I tried this for the first time with my usual method of making briyani, the rice took a long time to cook and I was not satisfied with the overall taste. This time, I let the rice cook in the broth and then added it the briyani masalas and baked everything for sometime. This way the rice absorbed all the briyani flavors and tasted really great. Actually I got a double thumbs-up from my hubby for this kuska. I also made Vellore brinjal serwa for the first time and this has changed my husband into a brinjal convert. This is the first time he loved any brinjal dish, so I think I’ll be getting more requests for this combo from now on :) The brinjal serwa can be found at Malar or at or Viki .


INGREDIENTS:

1. Brown basmati rice, 1 cup.

2. Onions, medium-size, 3.

4. Tomatoes 2.

5. Green chilies, 1-2.

6. Ginger-garlic paste, 1 tablespoon.

7. Chili powder, 1 teaspoon.

8. Chopped mint leaves, ½ cup.

9. Curry leaves and cilantro for garnishing.

10. Cinnamon, 1 small stick.

11. Bay leaf, large, 1.

12. Cloves, 2.

13. Star anise, 1.

14. Cardamom, 2 pods.

15. Fennel seeds, 1 teaspoon.

16. Briyani masala powder, 1 teaspoon.

17. Chicken broth or vegetable broth for cooking the rice, 1 cup mixed with 1 cup of water. The broth can be store bought or homemade, even fat-free versions are available in the groceries.

18. Yogurt,1 tablespoon.

19. Salt as per taste.

20. Cashews, 1 tablespoon.


PREPARATION:

Wash the rice well and soak it for 30 minutes and cook the rice in the chicken or vegetable broth until the grains are fluffy. The rice can be cooked either in pressure cooker or microwave. If pressure cooker is used for cooking, cook the rice just up to 3 whistles. Let the rice cool. Meanwhile dice the onions and tomatoes finely. Heat a thick bottomed pan, with 2 tablespoons of oil. When the oil turns hot, add all the spices and cashews and let them fry for a minute. Then add the chopped onions and curry leaves and sauté them for a few minutes until the onions turn brown. Now add the chopped tomatoes, slit green chilies, ginger-garlic paste and keep sautéing until everything is blended. Add the chili powder, briyani masala, yogurt, and salt and let it cook for a few more minutes. When the mixture is well blended and good smell starts coming from the mixture, add the cooked brown rice, chopped mint and cilantro leaves, mix everything and lower the flame. Cook closed for 15 minutes under low flame and switch off the stove. Another method is at this stage, the contents can also be transferred to a baking dish and closed with an aluminum foil as tightly as possible and cooked in a preheated oven for 15 minutes at 350 degrees. Serve hot kuska with raita and any spicy vegetarian or non-vegetarian dishes and enjoy.

PESARATTU/ MOONG DHAL DOSA


I am always on the lookout for healthy breakfast ideas other than our regular weekdays oatmeal breakfast. On weekends, we have an elaborate breakfast like pongal, adais, and recently I started preparing pesarattu after seeing this is in many blogs. This is such a healthy breakfast and quick to prepare. When making adais, my grandma usually sautés some onions and then adds it to the adai batter. I did the same with the pesarattu batter. This version was really good. It smelled like onion dosas and the taste was just awesome. This time we had these with sambar and tomato thokku.


INGREDIENTS:

1. Green moong dhal/mung beans 1 cup.

2. Brown rice, a handful.

3. Ginger, a small piece.

4. Green chilies, 1-2.

5. Salt as per taste.

6. Cumin seeds, ½ teaspoon.

7. Small onions, 2.


PREPARATION:

Wash the rice and dhal and soak it for 3-4 hours. Grind it to a smooth batter along with ginger, green chilies, and salt. Meanwhile dice the onions very finely. Heat a small pan with some oil. When the oil is hot, add the cumin seeds and let it splutter. Then add the onions and sauté for a few minutes until the onions turn translucent. Add this mixture to the batter and mix well. To prepare the dosas, heat a flat cast iron pan or nonstick pan. Rub some oil on surface with a cloth or paper towel. When the surface of the pan is hot, take some batter in a ladle and pour it on the pan, and immediately spread it evenly with the help of a ladle. Add a little bit of oil on the corners if needed. After 1-2 minutes, flip the dosas to the other side and let it cook for another minute. Repeat the same with the reminder of the batter and serve hot pesarattu with any chutneys of choice.

APPLE RASAM


I had bookmarked this rasam recipe a longtime back from Viki's blog. This turned out great. This rasam was kind of soup and both sweet and sour taste. I tweaked Viki’s recipe a little bit and grated the apples and added it to the rasam. I also used very little tamarind since I had used a tart granny smith apple and this added enough sourness to the rasam. The tamarind can be entirely omitted too if needed. This is my version of Viki's apple rasam.


INGREDIENTS:

  1. Green apple or any tart apples,1.
  2. Tamarind, very little, a small gooseberry sized ball. (optional).
  3. Rasam powder (homemade or store bought). 1 teaspoon.
  4. Asafetida, 1 pinch.
  5. Mustard seeds, ½ teaspoon.
  6. Cumin seeds, ½ teaspoon.
  7. Red chilies, 2, (optional).
  8. Garlic, 3 cloves.
  9. Thalipu vadagam, ½ teaspoon, (optional).
  10. Salt as per taste.
  11. Curry leaves and chopped cilantro for garnishing.


PREPARATION:

Soak the tamarind in warm water for 15 minutes and extract thick juice from it. Grate the apples, dice the tomatoes finely, and crush the garlic coarsely. Heat a pot with a teaspoon of oil. When the oil is hot enough, add the mustard seeds and let it splutter. Then add the cumin seeds, red chilies, and vadagam and fry for a few seconds. Now reduce the flame to low and add the diced tomatoes and crushed garlic and sauté for a few minutes until everything is well blended. Add the grated apples and let it cook for 5-10 minutes until the apples are cooked. Add 3 cups of water, salt, asafetida, and tamarind juice and let it come to a boil. Once it comes to a boil, add the rasam powder, curry leaves, and chopped cilantro. Mix everything just once and switch off the stove. Serve with rice and any spicy side dish.

POONDU OORUKAI/GARLIC PICKLE


Homemade pickles are a great way to cut down sodium in diets. These are much better than the store-brought ones loaded with salt, preservatives, and oil. These days even a couple of weight loss programs recommend a low-sodium diet. If you are at a risk of getting diabetes or pre-diabetes or even if you have a stressful job, cutting down excess salt intake is also very important with along cutting down on refined foods. Lately, we have also been cutting down on sodium. I didn’t make any major changes in our diet except that we go for the unsalted version of nuts and chips and always look for the low-salt version of any foods we buy. I also started using sea salt instead of regular table salt for the past few months. Sea salt is a naturally low in sodium and moreover just a little of this can be added in places where larger amount of salt is used. The only thing I cannot control is our intake of pickles, especially my hubby’s :(….he needs to have pickle with every meal, so I started making pickles like garlic, tomato and mango pickle in batches and now we are having them instead of our usual ones. I saw some recipes for garlic pickles in a couple of sites and this is my own version of this pickle. I love this pickle with mixed rice varieties, particularly with briyanis.


INGREDIENTS:

1. Garlic cloves, around 10-12 if bigger cloves are used.

2. Sesame oil, ½ cup.

3. Sea salt, 1 teaspoon.

4. Chili powder or paprika powder, 2 teaspoons.

5. Mustard seeds, 1 teaspoon.

6. Lemon juice, ¼ cup.

7. Curry leaves, a spring.

8. Crushed jaggery, 1 teaspoon. (optional). The pickle tastes good even without the jaggery.

9. Asafetida, ¼ teaspoon.

To roast and grind:

1. Fenugreek seeds, 2 tablespoons.

2. Coriander seeds, 2 tablespoons.

3. Mustard seeds, 1 teaspoon.


PREPARATION:

Roast the ingredients given under the roast and grind category and grind everything into a smooth powder and keep aside. If bigger cloves of garlic are used, slice them into even pieces. Heat a pan with the sesame oil. Add the mustard seeds and let it splutter when the oil turns hot. Then reduce the flame and add the garlic, curry leaves, salt, all the ground powders, chili powder, salt, and asafetida and mix everything well. Let it cook for 10 minutes under low flame until the garlic is cooked. Then add the lemon juice and jaggery and cook for a few more minutes and switch off the stove. Transfer into airtight containers once cooled. This pickle can stay fresh for up to 3-4 weeks when stored in the refrigerator. It can be had as a side dish with rice, idlis, dosas, and chapathis.

SWEET AND SOUR NOODLE SOUP


The temperature is still in the 30s and 40s for us here. Many of my friends like me feel like we’ve had enough of winter and snow. We are all waiting for spring and warm temperatures :) I still continue making soups for dinner. Soup is turning into sort of comfort food for us these days. Most of time, our dinner will be some of kind of soup and garlic bread. For those of who feel garlic bread is high in fat, you can make your own garlic bread with whole wheat Italian loaf or any crusty bread and low fat butter like Smart Balance or Promise Activ. I usually mix some garlic powder or garlic paste with Promise Activ butter and smear it over the bread and toast them for 10 minutes in the oven. This is so good with soup. Sometimes instead of making garlic bread, we used to dip the toasted plain bread in garlic-flavored olive or canola oil and have them with soup. A real treat for garlic lovers like us!


INGREDIENTS:

1. Whole wheat noodle rolls, 2. (or whole wheat spaghetti).

2. Small red onion, 1.

3. Mixed vegetables like cabbage, carrots, and peas, 1 cup.

4. Ginger-garlic paste, 1 teaspoon.

5. Soya sauce, 1 tablespoon.

6. Corn starch, 1 teaspoon.

7. Salt and pepper as per taste.

8. Honey or agave nectar, 1 teaspoon.

9. Chili sauce, ½ teaspoon. I used a regular Chinese chili sauce, it has some chili flakes in it. (can be increased according to taste).

10. Any dried herbs of choice, 1/2 teaspoon.


PREPARATION:

Dice the onions and other vegetables finely. Heat a pot with some oil. Add the onions and sauté for a few minutes once the oil turns oil. When the onions are translucent, add the ginger-garlic paste and the vegetables and sauté for a few more minutes. Mix the corn starch with ½ cup of water and add it the soup. Then add 4 cups of water along with the sauces, honey, dried herbs, salt, and pepper and let it come to a boil. Once the soup comes to a boil, add the noodles and let it cook for a few more minutes until the noodles are done (cooking times for the noodles varies according to package instructions) and serve hot.

MUSHROOM AND PEANUT FRY


This is an interesting recipe, which came out from our love with peanuts. My hubby is crazy about peanuts that sometimes he adds peanuts to the side dishes as I keep cooking them. These even include dishes like upma and even cabbage and okra fry. As I cooking this curry, I saw some boiled peanuts from yesterday’s snack lying in the fridge. They immediately went into the mushroom fry and were relished until it was over :) If raw cashews are available, they can be added too. It will be just as divine!


INGREDIENTS:

  1. Mushrooms, any type, 1 packet.
  2. Red onions, medium-size, 2.
  3. Cooked and deshelled peanuts, ½ cup.
  4. Ginger-garlic paste, 1teaspoon.
  5. Chili powder, 1 teaspoon.
  6. Coriander powder, 2 teaspoons.
  7. Garam masala (optional), ½ teaspoon.
  8. Turmeric powder, ¼ teaspoon.
  9. Fennel seeds, ¼ teaspoon.
  10. Curry leaves and cilantro for garnishing.
  11. Salt as per taste.


PREPARATION:

Dice the onions finely and slice the mushrooms thinly. Heat a pan with some oil. When the oil is hot enough, add the fennel seeds and fry for 2 seconds. Add the onions and curry leaves and sauté for a few minutes until the onions turn brown. Now add the ginger-garlic paste and keep sautéing until everything is well blended. Add all the powders and salt and mix everything well and cook for 5 minutes until the powders lose their raw smell. Now add the mushrooms and peanuts and keep cooking under medium flame. After 10 minutes, the mushrooms oozes out all the water and the dish will turn dry. Garnish with chopped cilantro and serve hot curry with rice or chapthis.