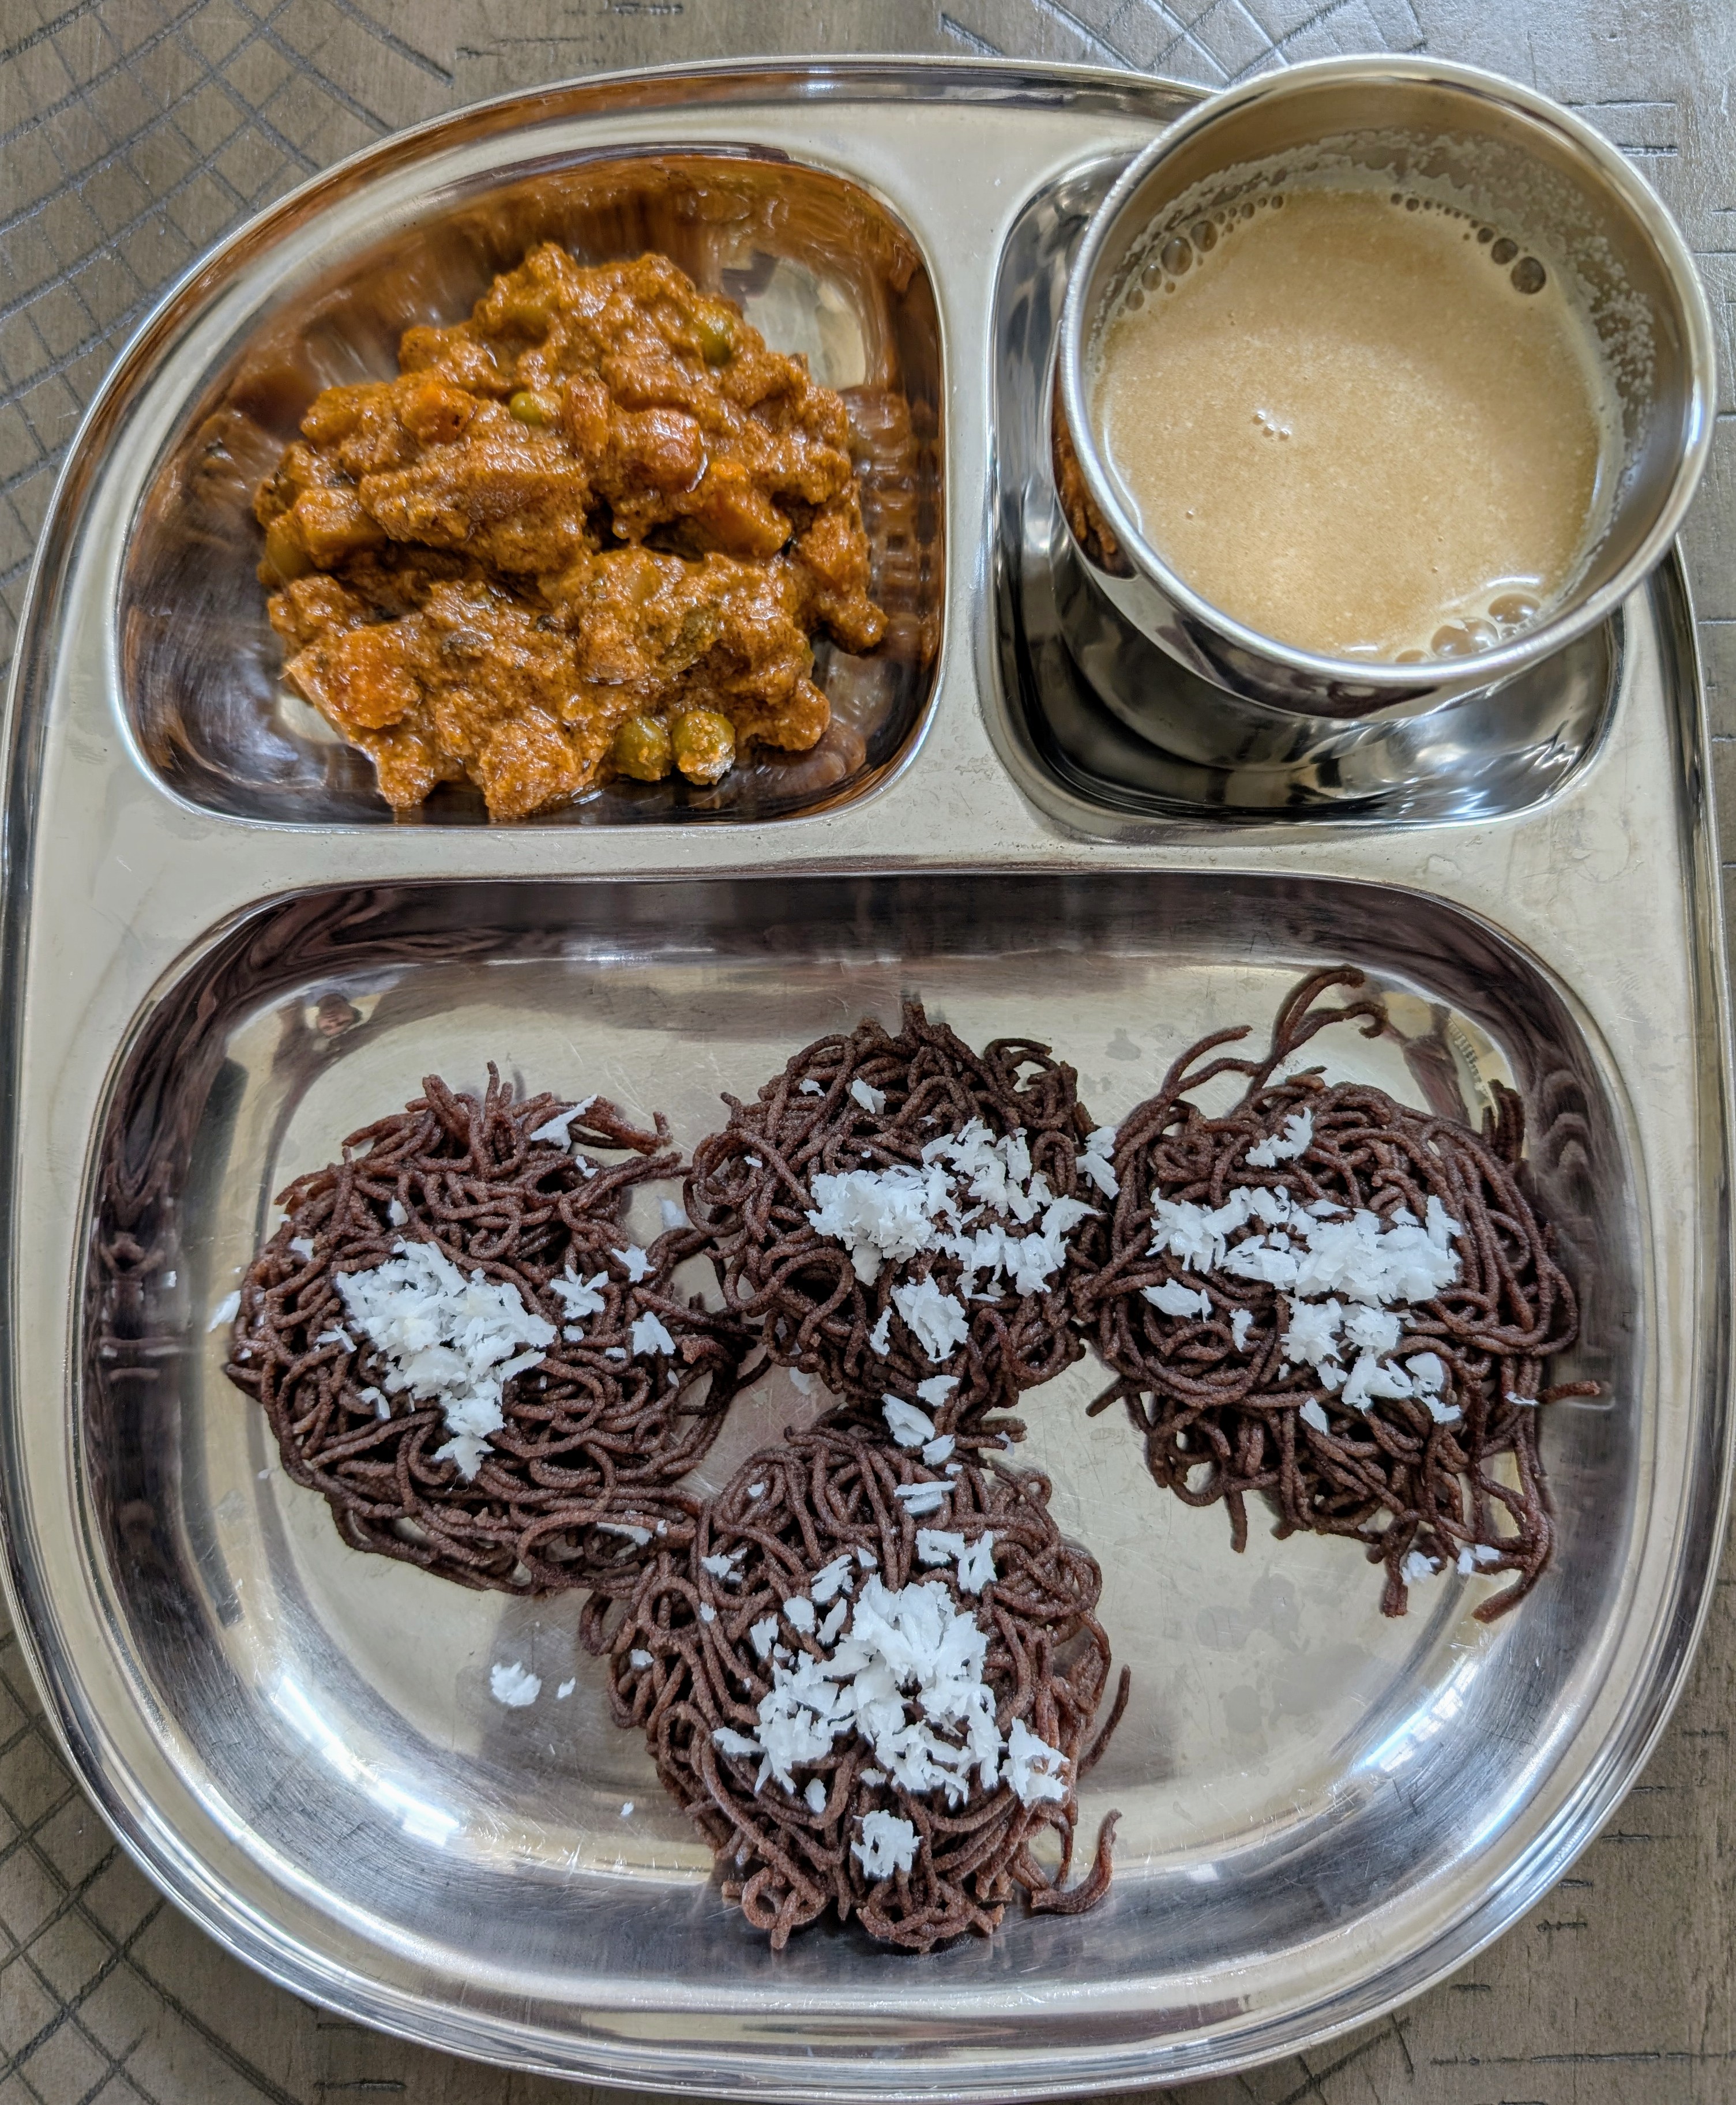
CRANBERRY RICE


This awesome recipe idea is from my hubby. With Thanksgiving Day just around the corner, who doesn’t get tempted on seeing abundant fresh cranberries in the market? I bought a big packet of cranberries with the idea of trying out cranberry pickle and maybe a dhal dish. It was my hubby who suggested after tasting the pickle that these taste as sour as tomato and why don’t we substitute these for tomatoes in thakali sadam (tomato rice), so here goes the recipe. Here I have used just 4-5 cranberries for half a cup of rice since we don’t prefer that much sourness in rice dishes. The cranberries can be increased or decreased according to individual preferences. Try adding 3 cranberries initially and when the mixture is cooked, just before adding the rice taste it for sourness and then add more cranberries if more sourness is preferred.

INGREDIENTS:
1. Any rice variety preferably basmati rice, 1/2 cup.
2. Cranberries (fresh or frozen),4-5.
3. Red onions, medium-size, 2.
4. Ginger-garlic paste, 1teaspoon.
5. Chili powder, 1 teaspoon.
6. Coriander powder, 2 teaspoons.
7. Garam masala (optional), ½ teaspoon.
8. Turmeric powder, ¼ teaspoon.
9. Mustard seeds, ½ teaspoon.
10. Broken cashews, 1 tablespoon.
11. Fennel seeds, ¼ teaspoon.
12. Curry leaves and cilantro for garnishing.
13. Salt as per taste.

PREPARATION:
Cook the rice separately and let it cool. The rice should not be mushy. Dice the finely. Heat a pan with some oil. When the oil is hot enough, add the mustard seeds and let it splutter. Then add the fennel seeds and cashews and fry for a few seconds. Add the onions and sauté for a few minutes until the onions turn brown. Now add the ginger-garlic paste, all the powders, and salt. Mix everything well and cook for 5 minutes under low flame. Now add the cranberries and cook for a few more minutes until the cranberries get mushy and blend with the mixture. Add the cooked rice to this mixture and mix well. Garnish with curry leaves and chopped cilantro and enjoy.

CRANBERRY PICKLE


I tried cranberry pickle from my friend Malar’s blog and they turned out great. Thanks a lot Malar for this drool-worthy pickle recipe. I followed her recipe exactly here. For the original recipe, click here

CHANNA MASALA – A DIFFERENT METHOD


I tasted this dish at my friend’s house recently. Initially when she served me this, I thought it was made with spinach. I couldn’t believe my friend when she told me that it was cilantro which gave the vibrant green color to the dish. It was so tasty and flavorful that I prepared it the same week. The key ingredient here is cilantro. I feel that adding tons of cilantro takes regular channa masala to a whole different level. The photo does not do any justice to the dish but most of the channa masala was devoured by my husband and me before I had a chance to take a click but I took a photograph anyway. I am sure everybody would love this once you gave it a try :)


INGREDIENTS:

  1. Dry chickpeas, ½ cup.
  2. Onion, medium-size, 1.
  3. Tomato, 1.
  4. Cilantro, 1 big bunch.
  5. Ginger-garlic paste, 1 teaspoon.
  6. Chili powder, 1 teaspoon.
  7. Coriander powder, 2 teaspoons.
  8. Garam masala or channa masala powder, 1 teaspoon.
  9. Cumin powder, ½ teaspoon.
  10. Salt as per taste.


PREPARATION:

Soak the chickpeas overnight or for 6-8 hours. Remove the cilantro leaves from the stems, wash them well and keep aside. Chop the onion and tomatoes into big chunks. Heat a pan with some oil. When the oil is hot enough, add the chopped onions and sauté for a couple of minutes until the onions are caramelized. Then add the tomatoes and ginger-garlic paste and keep sautéing until everything is well blended. Switch off the stove and let it cool. Once everything is cool, transfer the contents to a blender along with the chopped cilantro. Blend everything into a smooth paste. Transfer everything into a pressure cooker. Add the chick peas, all the powders, salt, and the chickpeas along with 1 cup of water. Pressure cook for 2-3 whistles until the chickpeas are cooked. Once the pressure is released, it can be served as it is with chapathis. If needed, the dish can be cooked in a pan for a few more minutes under low flame to get the desired consistency.

SIMPLE AND EASY PASTA


I prepared this pasta dish in just 15 minutes after a long day out. We wanted to have something simple and tasty and I was not in the mood to cut any vegetables. I just cooked some pasta and tossed it with some sauces and lots of cilantro and it was absolutely delicious. Adding cilantro adds a nice subtle flavor to the dish. Again any type of vegetables can be added here for additional taste and nutrition.


INGREDIENTS

  1. Any whole wheat pasta around ½ a packet.
  2. Onion- 1.
  3. Chopped cilantro, 1 cup.
  4. Ground pepper according to taste.
  5. Low-sodium soy sauce, 2 tablespoons.
  6. Chili sauce, 1 teaspoon (optional).
  7. Salt to taste.


PREPARATION

Cook the pasta to al-dente, drain the water, and let it cool. Meanwhile dice the onion finely. Add some oil to a pan or wok and when the oil is hot enough, add the onions and half of the chopped cilantro and sauté everything until the onion turns translucent. Then add the sauces, salt, pepper, and the cooked pasta and mix everything well. Mix in the remaining of the chopped cilantro at the end and serve hot.

MEAL MAKER OR SOYA NUGGETS FRY

I am back from my hibernation. It had been a month since I blogged. I was not feeling well with the change in weather and then my laptop was infected with virus. All my drafts including my project work had been deleted :( Now that everything has been restored, things are back to normal. I thank all my friends who were inquiring about me and also showering me with so many awards during the past one month. I’ll catch up with all your post soon :)

Coming to the recipe, this fry tastes almost similar to a chicken fry, a healthy dish for both vegetarians and meat-lovers. This dish is my hubby’s favorite. I make this as a side dish when I making briyani but this goes well with sambar, rasam, or curd. I have added some roasted peanuts at the end, even roasted cashews can also be added here.

INGREDIENTS

  1. Soya nuggets around 1 cup.
  2. Onions, medium-sized -2.
  3. Ginger-garlic paste- 1 teaspoon.
  4. Chili powder, 1 teaspoon.
  5. Coriander powder, 2 teaspoons.
  6. Turmeric powder, ¼ teaspoon.
  7. Mustard seeds, ¼ teaspoon.
  8. Green chilies, 1 (optional).
  9. Cumin seeds-1 teaspoon.
  10. Garam masala (optional, tastes good even without garam masala).
  11. Salt, as per taste.
  12. Roasted peanuts, ¼ cup.
  13. Curry leaves and cilantro for garnishing.

METHOD

Take a cup of soy nuggets and put them in boiling water for 2 minutes until the nuggets are puffed up. Let them sit for 5 minutes, then rinse them well, drain them, and cut into small bite-size pieces. Dice the onion finely and slit the green chilies into two. Heat a kadai and add 1 tablespoon of oil. When the oil is hot, add the mustard seeds and let it splutter. Then add the cumin seeds and fry them for a few seconds. Now add the onions, chili, and a sprig of curry leaves and sauté well for a few minutes until the onions have caramelized, and then add the ginger-garlic paste and sauté for a minute. Add chili powder, coriander powder, turmeric powder, and salt, and fry everything for a few minutes until the spices lose their raw smell. If needed a tablespoon of water can also be added at this stage. Reduce the heat and add the chopped nuggets and peanuts and mix everything well. Cook closed under low flame for 5 minutes until everything is well blended and the soya granules absorb all the flavors. Turn off the heat, garnish the dish with cilantro on top and serve with rotis, idlis, and dosas.

KATHRIKAI KOOTUU (EGGPLANT DHAL)

This picture had been lying in my draft for a long time. I made this dish during those days when I used to make a dish and post it on the same day with the date on the picture. I found this out today as I was going through the old pictures. I guess its better late than never :) This is a recipe of my friend. I learnt this dish from her during my early marriage days when we were in Hyderabad. She usually prepares this as a side dish for idlis and dosas rather than with rice. This is more or less similar to kothsu and the moong dhal added here is very less compared to the regular kootus. I think this kootuu must go well with rice too though we have not yet tried it with rice. Here goes the recipe:

INGREDIENTS:
Moong dhal, ¼th cup.
Eggplant, a big one if bigger varieties like Japanese eggplants are used or 4-5 if regular small-sized ones are used.
Small onions, 1 cup.
Tomatoes, small, 2.
Chili powder, 1 teaspoon.
Coriander powder, 1 teaspoon.
Sambar powder, ½ teaspoon (optional).
Garlic, 2 cloves.
Mustard seeds, 1 teaspoon.
Cumin seeds, 1 teaspoon.
Asafetida, 1 pinch.
Salt as per taste.
Vadakam ½ teaspoon, (optional).
Turmeric powder, ½ teaspoon.

PREPARATION:
Wash the moong dhal. Chop the eggplants and tomatoes into small pieces. Peel the onions and crush the garlic coarsely. Take a pressure cooker or a pressure pan and put the washed moong dhal, chopped eggplants, tomatoes, peeled onions, crushed garlic, turmeric powder, all the powders, salt as per taste along with 1-1/2 cups of water. Pressure cook for about 10-15 minutes up to 3 whistles. Transfer the cooked dhal to a vessel when the pressure is released. The eggplants will be well mashed up at this stage. If they are still whole, mash them with a spatula. Meanwhile heat a small pan with 1 teaspoon of oil. When the oil is hot enough, add the mustard seeds. When the mustard seeds start to splutter, add the cumin seeds, vadakam, asafetida let them fry for 30 seconds and switch off the stove. Add the seasonings to the kootuu and mix everything well and serve hot with idlis, dosas, rotis, or rice.


Thanks to the Food Buzz team for sending me Nature’s Pride Breads as a part of their TasteMaker’s Program. We have never brought Nature’s Pride breads before and I like the texture of these breads particularly the 12-grains bread. We have been having these as a simple peanut butter and jam sandwiches. I am planning to try something different with these too like a bread pudding for the weekend.

About Me

My Photo
Gita
Cooking and trying out new recipes is my passion. These days, I am focusing on healthy recipes, particularly low-carb dishes, since I come from a family of hard-core diabetics. This blog is my first step towards a healthy lifestyle. I hope that my blog inspires you to make healthy choices.
View my complete profile

Blog Archive